

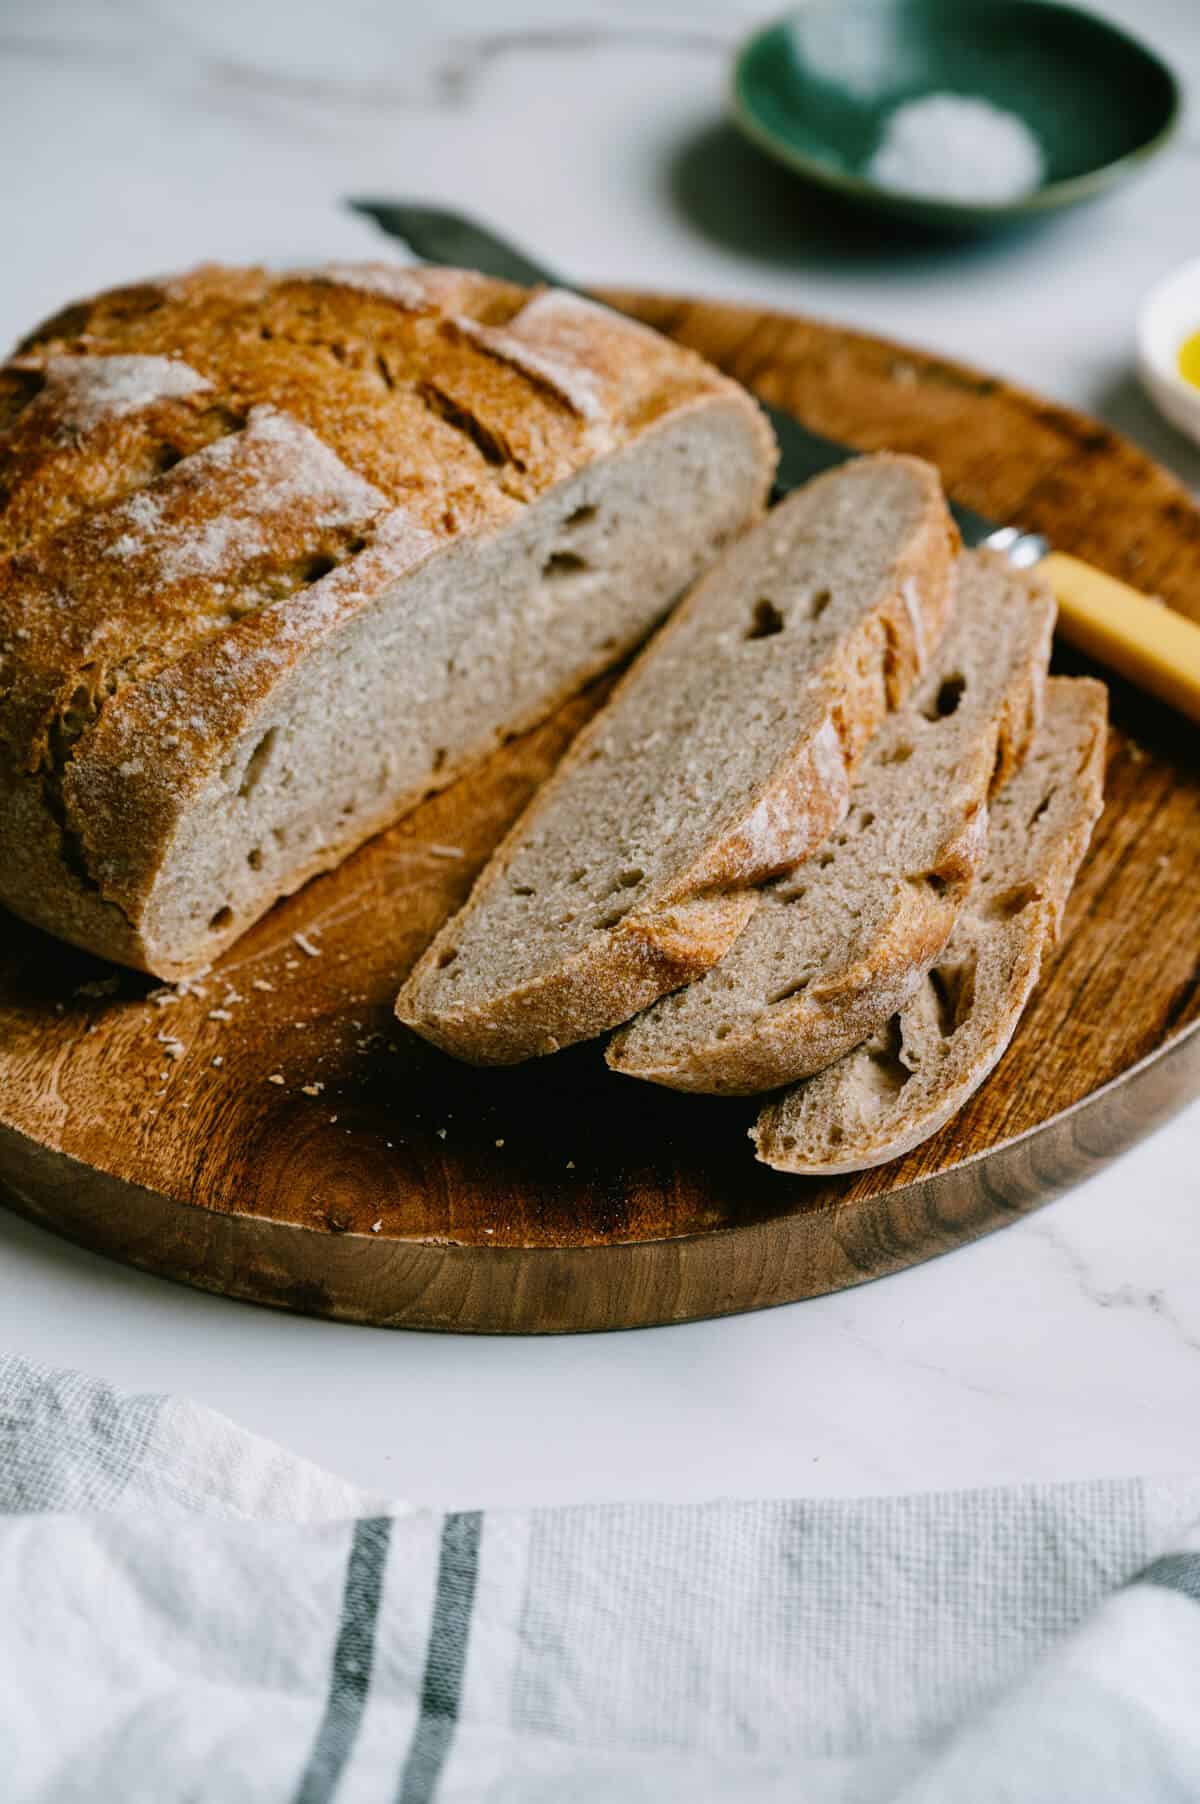
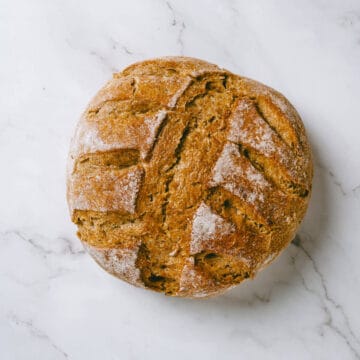
This Greek bread recipe, known as horiatiko psomi, delivers a crusty, golden loaf with a soft, airy crumb. Made from basic ingredients and baked hot for perfect texture, it's an easy, reliable way to bring authentic Greek flavour to your kitchen. Follow my step-by-step method for consistent results every time.

Table of Contents
Recipe snapshot

Ready in: 3 hrs (rising + baking) | Serves: 1 large loaf
- Rustic Greek country bread with a crisp crust and soft, airy crumb.
- Made with simple pantry ingredients and baked hot for perfect colour and texture.
- Easy, hands-off method with reliable results every time.
What is "Horiatiko Psomi"?
Horiatiko psomi, which translates to "village bread" or "country bread", ("psomi" means bread in Greek) is a staple in Greek cuisine and is made with simple ingredients such as flour, water, yeast, and salt. Grecian bread is traditionally baked in wood-fired ovens, giving it a unique and distinctive sourdough flavour. The crust is usually rustic and golden brown, while the inside remains soft and airy.
Why this recipe works
- Simple and reliable: Just a few ingredients, one bowl, and minimal effort.
- Perfect texture: Crisp crust with a light, chewy crumb every time.
- Authentic flavour: Captures the taste of traditional Greek village bread.
- Versatile: Enjoy Greek bread with olive oil, grilled meats, or your favourite dips.
🥖 Other specialty Greek breads
If you're interested, I have more Greek bread recipes for you.
- Try my Greek Easter bread (tsoureki) is a specialty that beats brioche in taste and texture.
- My Greek flatbread - "lagana" is soft, chewy and drenched in sesame seeds.
- And let's not forget my Greek yogurt flatbread - 2 ingredients, and you have the tastiest Greek pita bread in no time!
Ingredient Notes
Here are the key ingredients you'll need to make this easy Greek bread recipe:

- Bread flour: Use strong white bread flour for the best texture and structure. Substitute with all-purpose or plain flour if needed.
- Rye flour: Adds a lovely earthiness and subtle colour to this bread. You can replace it with whole wheat flour if preferred.
- Semolina flour: Optional, but it adds a touch of density and body. I found it gives the loaf a more rustic feel during recipe testing. If you don't have any, use all-purpose flour instead.
- Dry yeast: Use instant yeast for consistency and a reliable rise.
- Water: Helps bring the dough together. It should feel warm to the touch, not hot.
- Sugar: Optional, but a small amount balances the flavour nicely.
- Salt: Essential for flavour - don't skip it.
- Optional topping: Sprinkle sesame seeds for extra flavour and crunch.
How to make Greek bread
For the full recipe, see the instruction card below. The pictures below offer a visual guide for mixing, shaping and baking this Greek style bread to perfection. Please watch the video as well!
Mixing

- Step 1: Combine the bread flour, rye flour, semolina, dried yeast, sugar and salt in a large mixing bowl and stir to combine.
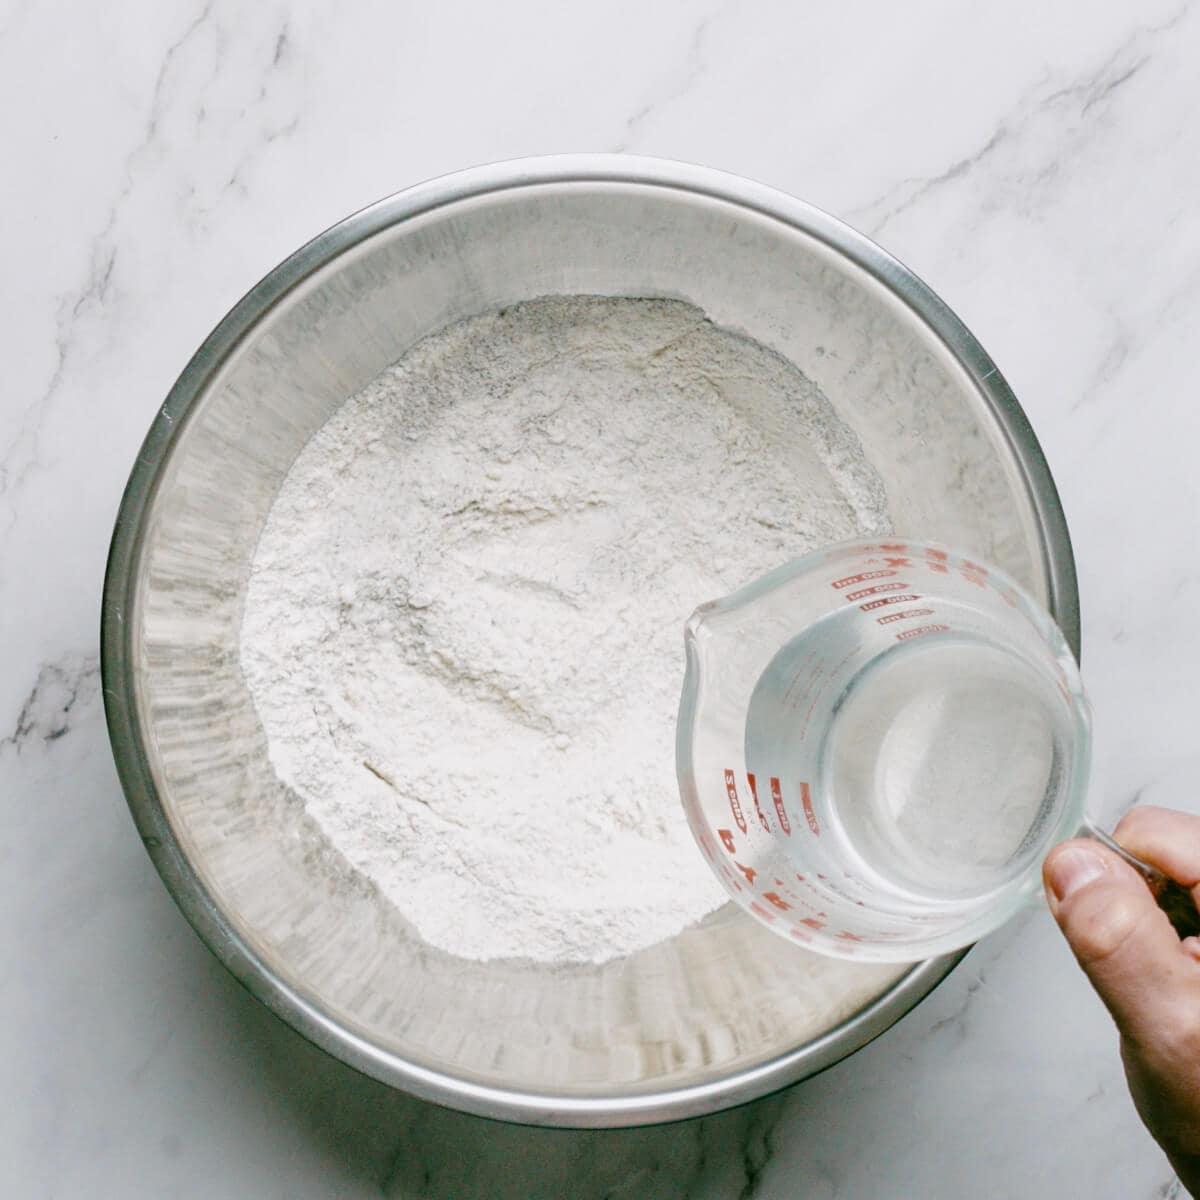
- Step 2: Gradually add the water to the flour and yeast mixture and stir until you have a shaggy, rough dough. Cover with a kitchen towel and allow the dough to rest for 15 minutes.

- Step 3: Using a spatula or wooden spoon, gradually pull the dough from the sides of the bowl to the centre. Cover again, let it rest for fifteen minutes and repeat this step three more times.
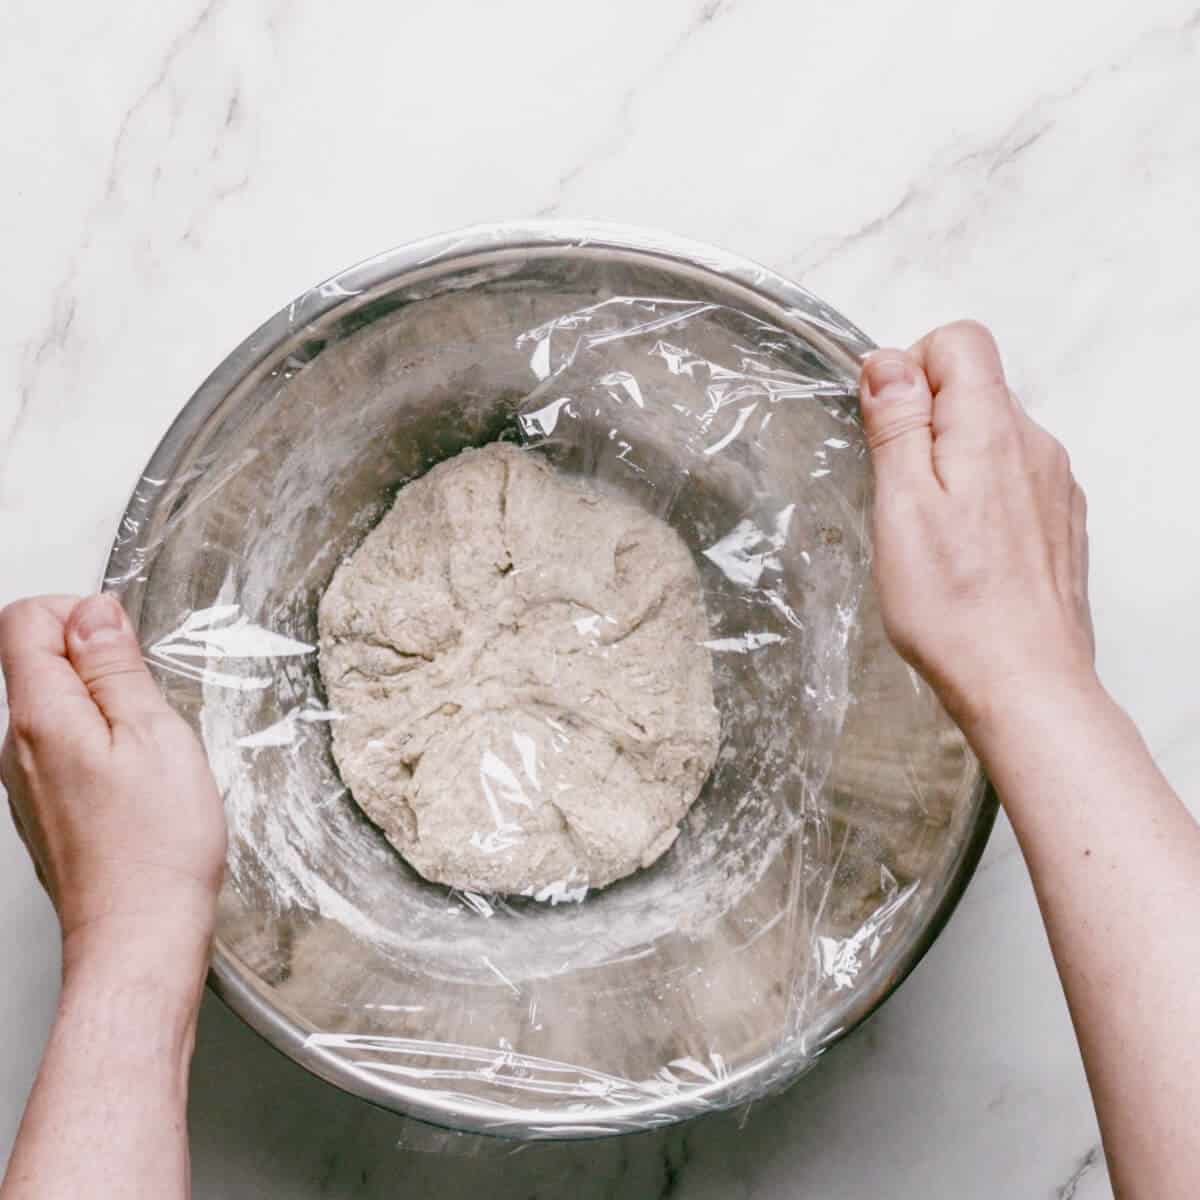
- Step 4: Cover the dough in plastic wrap (cling film) and leave the dough to rise for 4 - 24 hours.
Shaping
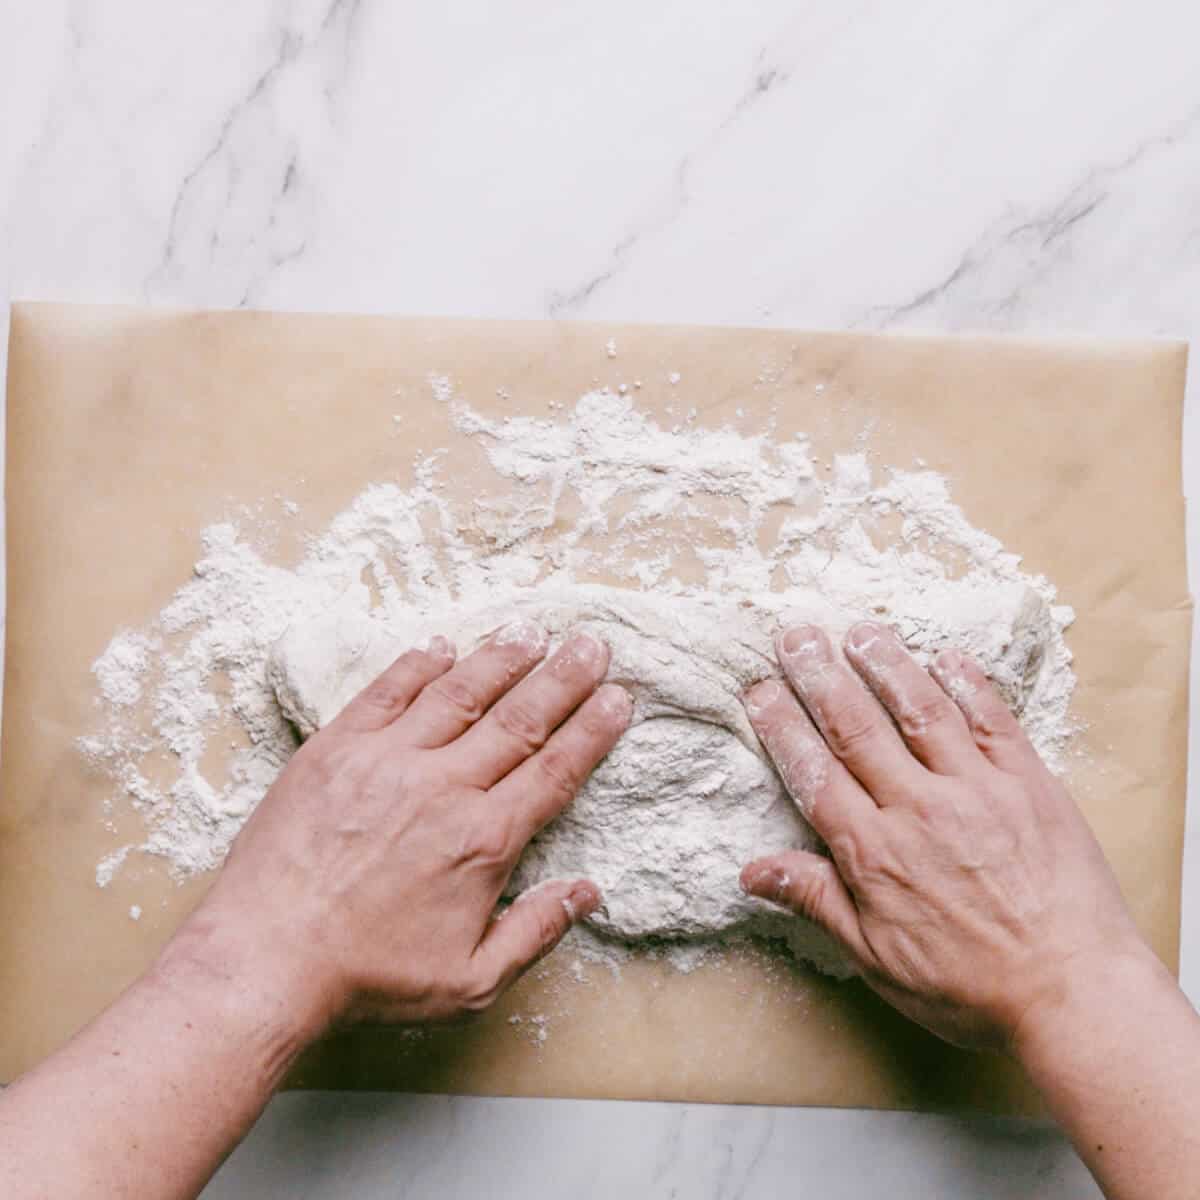
- Step 1: Transfer the dough to a clean, lightly floured surface, gently knead it, and stretch it to resemble a rectangle.

- Step 2: With the longer edge facing you, fold the longer sides into the centre and the shorter ends into the centre.
Email This Recipe

- Step 3: Using your hands, shape the dough into a round ball.
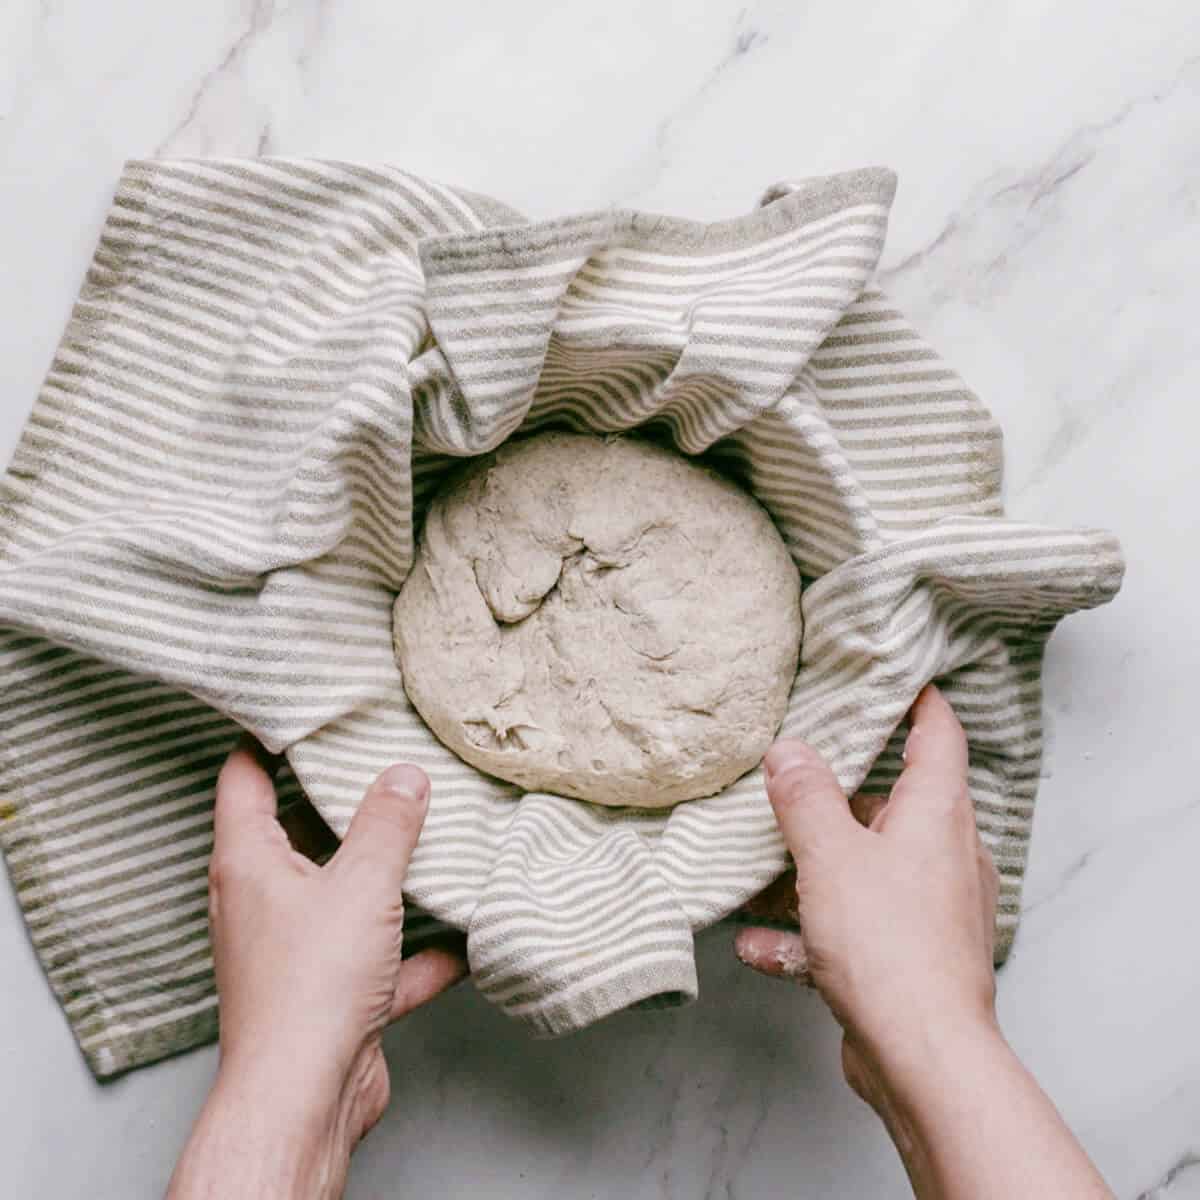
- Step 4: Place the dough ball into a bowl lined with a clean towel. Cover and let it rest for a second time until it doubles in size. (this could take anywhere between 60-90 minutes).
Baking

- Step 1: Preheat your oven to 230°C (450°F) and place an oven-safe pot with a lid to heat up for 30 minutes.
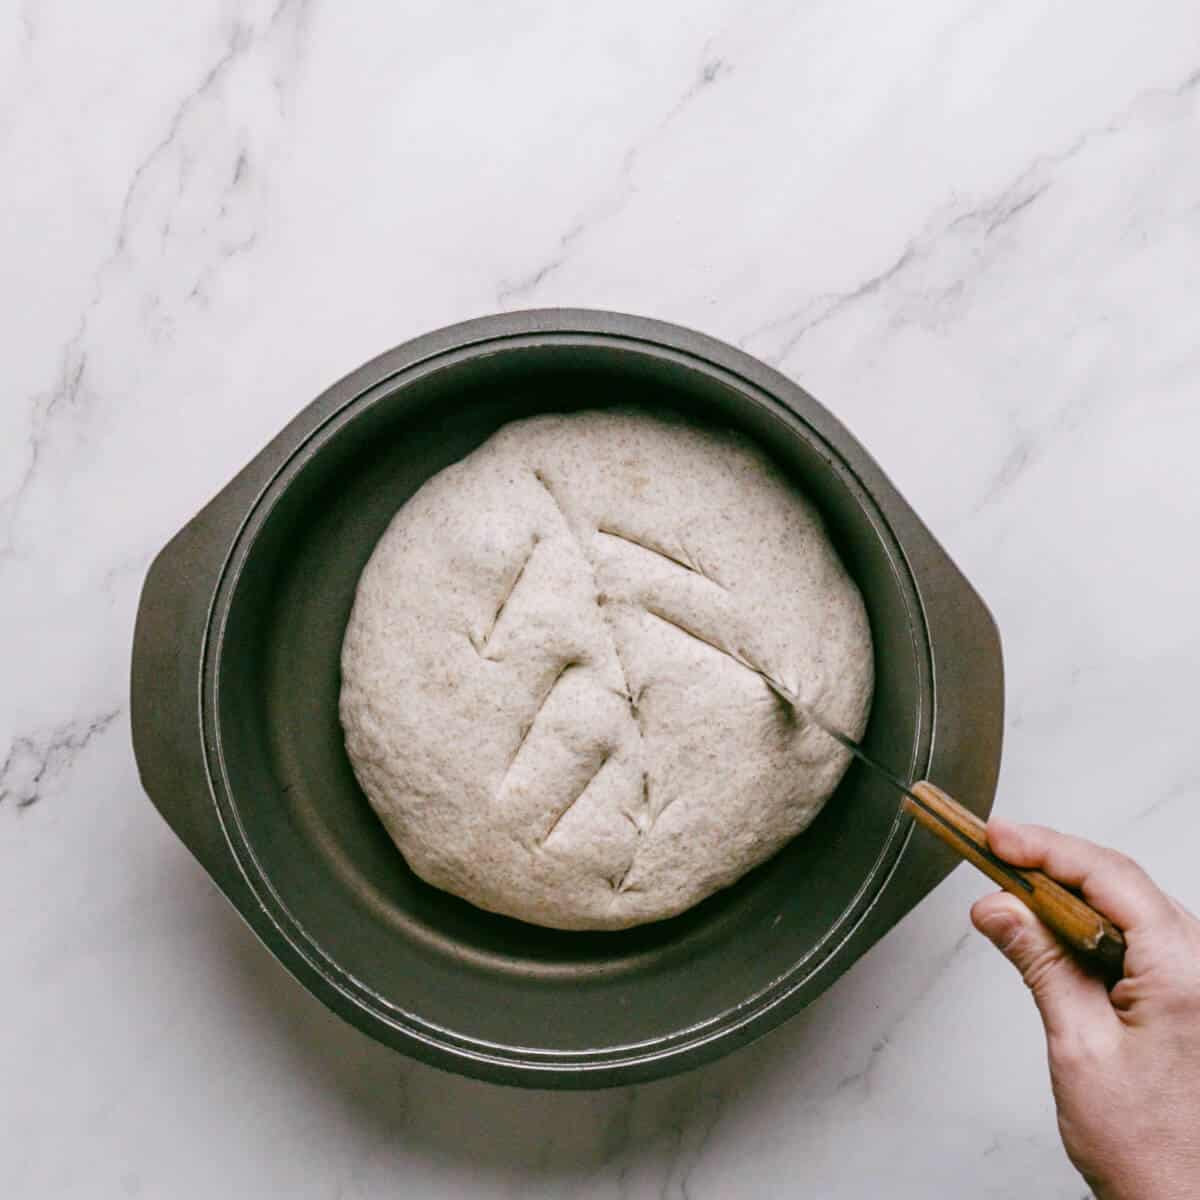
- Step 2: Once heated place the dough into it. You can score at the top if you like. Place the lid back on and bake for 30 minutes.
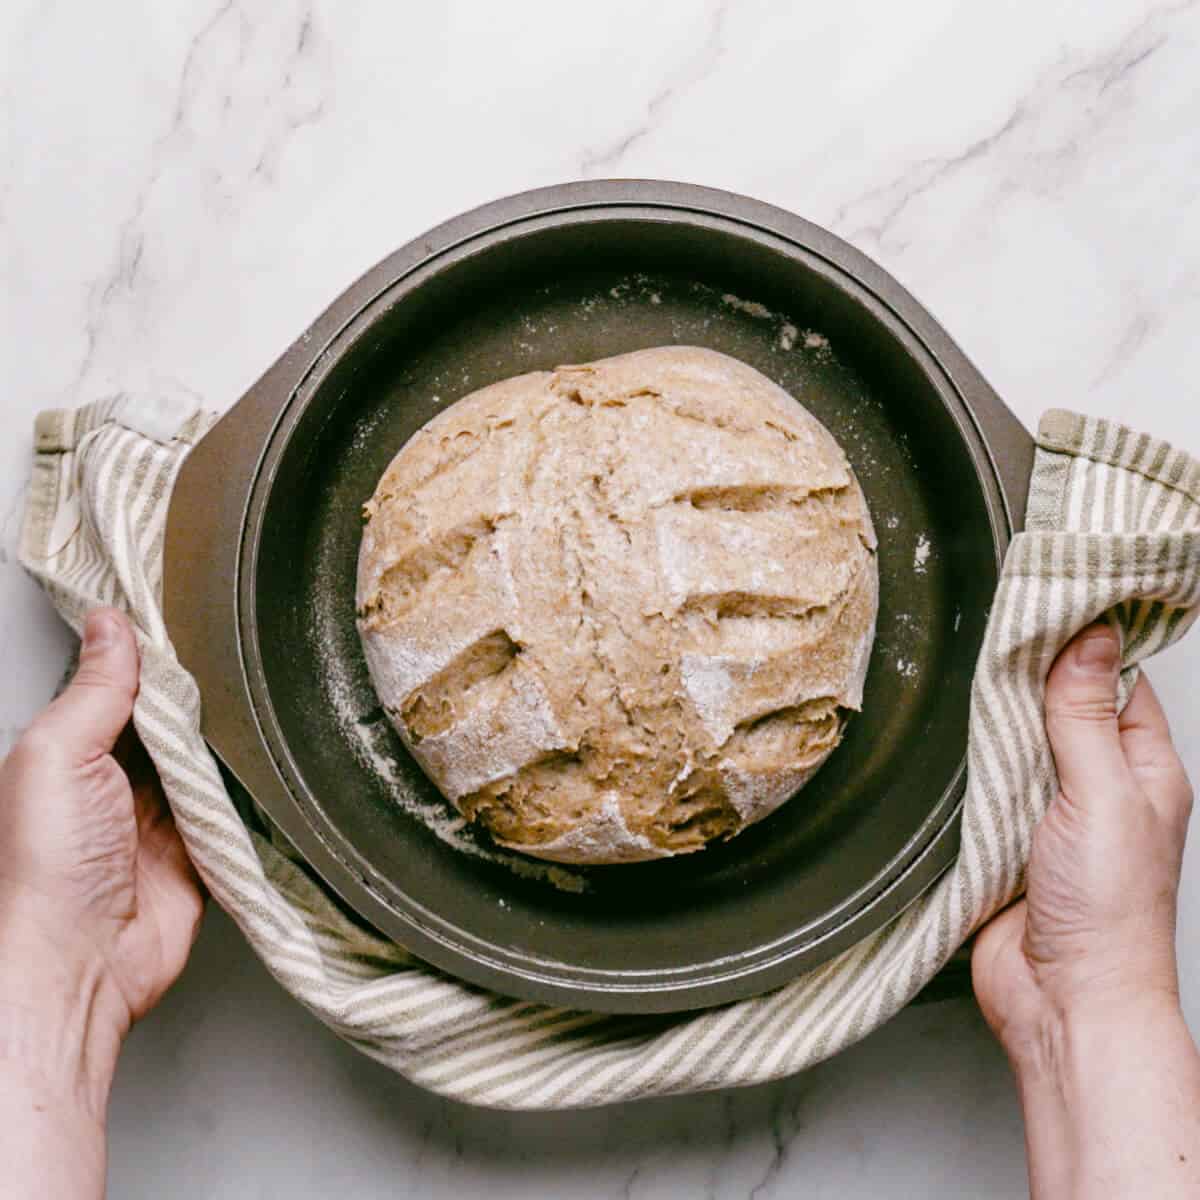
- Step 3: Very carefully remove the lid ( you will notice the bread is partially baked and pale in colour - don't panic! That's normal!). Drop the temperature to 220°C (430°F) and bake for 20 minutes.
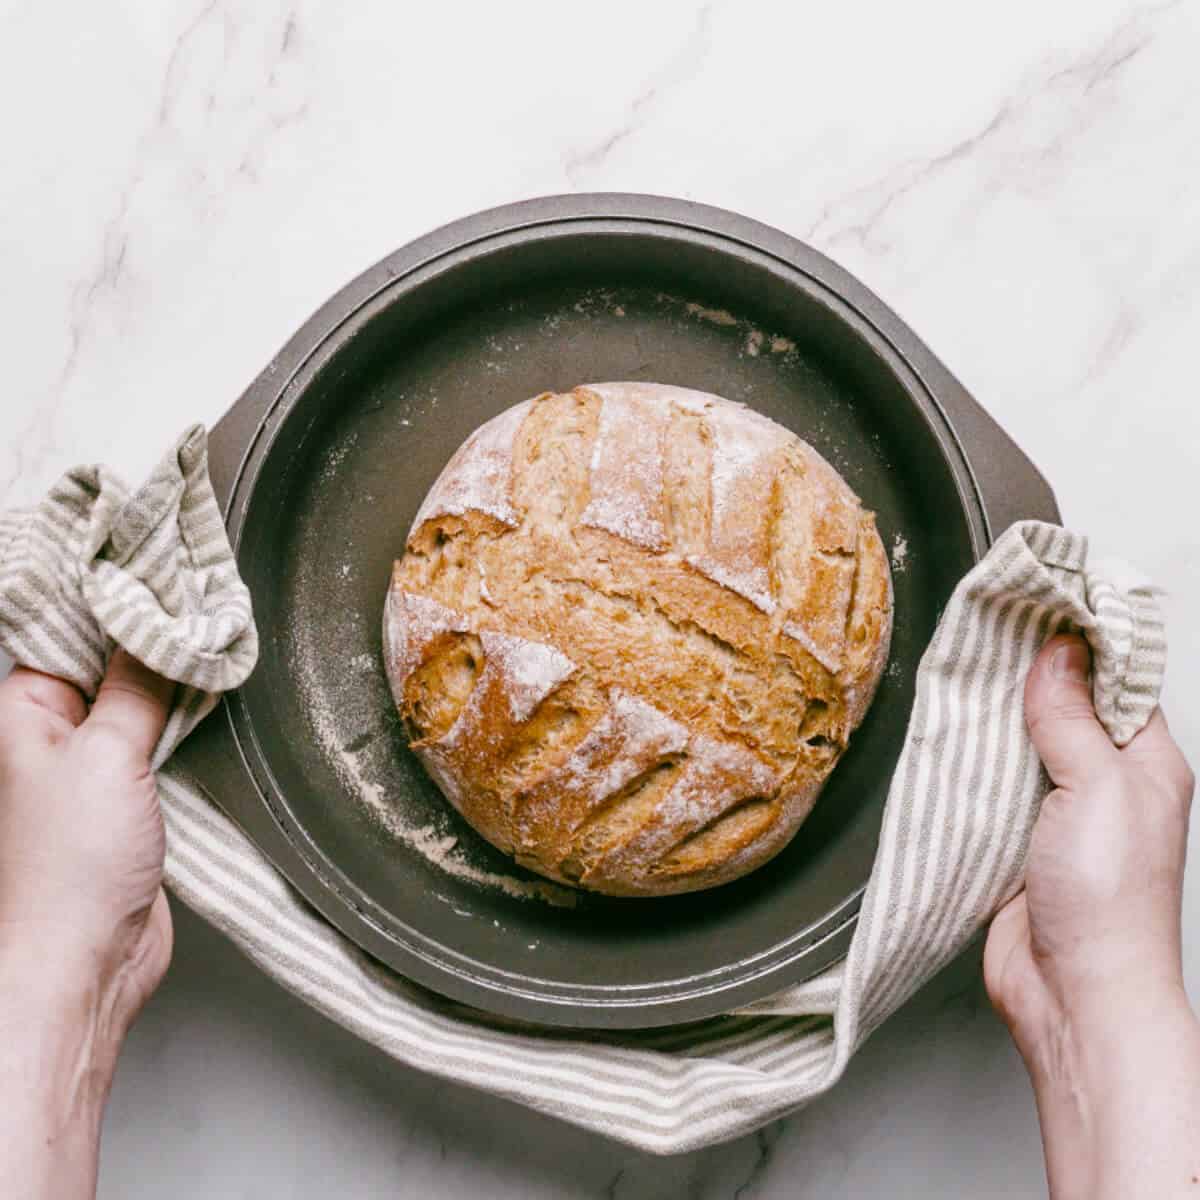
- Step 4: Remove the pot from the oven (the bread should be golden brown) and allow it to cool completely before serving.
Expert tips
- Flour options: Bread flour gives great structure, but all-purpose flour works beautifully too. I've made this Greek bread many times with excellent results.
- Mixing method: A stand mixer is fine, but this dough is best worked by hand so you can feel its texture. It's a no-knead style loaf, so skip the fancy tools - getting your hands into it is part of the fun.
- Olive oil: Add up to 1 tablespoon if the dough feels dry. A small amount goes a long way and helps create a softer crumb.
- Resting the dough: Always let the dough rest before baking. It relaxes the gluten and makes shaping easier. For deeper flavour, refrigerate overnight to allow slow fermentation. Bring to room temperature before baking.
- Shaping: Lightly flour your surface - just enough to prevent sticking - and shape gently.
- Baking vessel: A Dutch oven is ideal, but any oven-safe pot with a lid will do (ceramic or stainless steel are great). Avoid aluminium.
- Alternative baking method: If you're not using a pot, bake the shaped dough on parchment paper at high heat for about 40 minutes, until golden and crisp.
- Doneness test: Tap the bottom of the loaf - a hollow sound means it's perfectly baked.hollow sound, you know it's done.
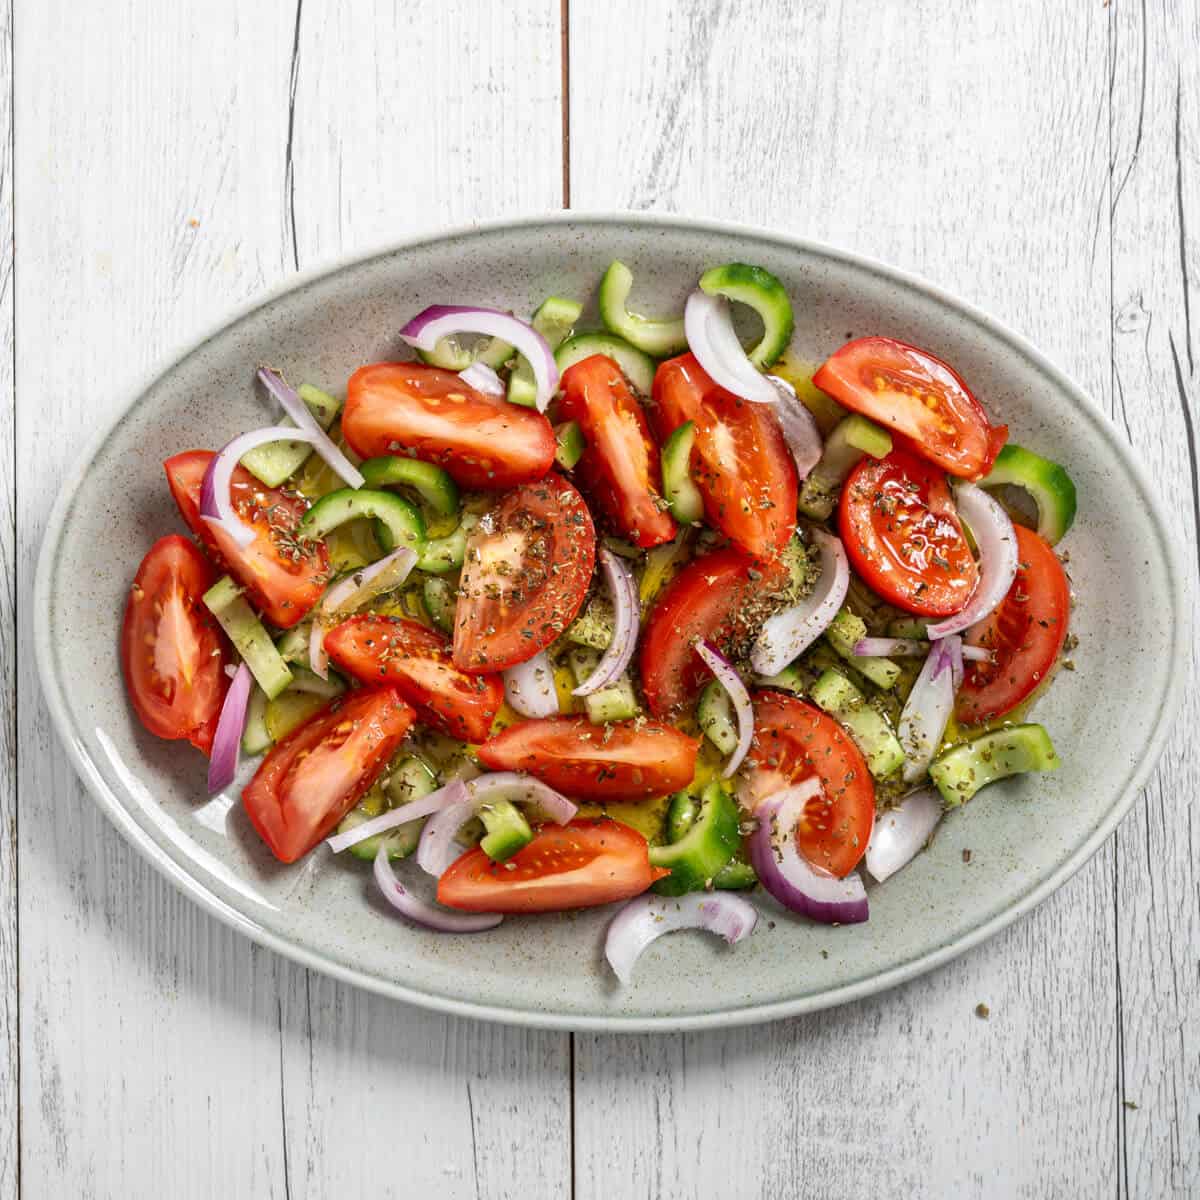
Serving Suggestions
Here are some suggestions for you try my Greek bread recipe with:

Serve warm with ladolemono - these two are a match made in heaven!

Pair with classic Greek salads like my maroulosalata, Greek cabbage salad.

Use it to scoop up dips such as tzatziki, melitzanosalata, or taramasalata.
FAQ
Greek bread is often called horiatiko psomi (village bread) or psomi spitiko (homemade bread). Both describe the same rustic loaf enjoyed throughout Greece.
Yes. Follow your bread machine's instructions for mixing and baking. Just remember that the loaf will take on the shape of the machine's tin rather than a traditional round form.
Dense bread usually means the dough didn't rise long enough or the yeast wasn't active. Make sure your water is warm, not hot, and allow enough resting time for the dough to double before baking.
Storing & freezing
- If you want to enjoy this delicious bread - store it in a plastic bag at room temperature for up to one week. However, for best results, store it in the refrigerator.
- If freezing - slice it and toast the bread from frozen (no need to thaw it first).
More bread recipes


Enjoyed this recipe? Sign up to the Newsletter and follow along on Facebook, Instagram and Pinterest
📖 Recipe
Greek Bread Recipe (Horiatiko Psomi)
Video
Conversions
Ingredients
- 200 grams bread flour, (see note 1)
- 100 grams rye flour, (see note 2)
- 100 grams semolina flour, (see note 3)
- 2 grams dried yeast, the instant type
- 1 tsp sugar, granulated
- 1 tsp sea salt
- 300 ml water, tepid or lukewarm
Instructions
- Combine the bread flour, rye flour, semolina, dried yeast, sugar and salt in a large mixing bowl and stir to combine. (see note 4)200 grams bread flour (see note 1), 100 grams rye flour (see note 2), 100 grams semolina flour (see note 3), 2 grams dried yeast the instant type, 1 teaspoon sugar granulated, 1 teaspoon sea salt, 300 ml water tepid or lukewarm
- Gradually add the water to the flour and yeast mixture and stir until you have a shaggy, rough dough.
- Cover with a kitchen towel and allow the dough to rest for 15 minutes.
- Using a spatula or wooden spoon, gradually pull the dough from the sides of the bowl to the centre.
- Cover again, let it rest for fifteen minutes and repeat this step three more times.
- Cover the dough in plastic wrap (cling film) and leave the dough to rise for 4 - 24 hours. (see note 5)
- Transfer the dough to a clean, lightly floured surface, gently knead it, and stretch it to resemble a rectangle. (see note 6)
- With the longer edge facing you, fold the longer sides into the centre and the shorter ends into the centre (repeat this step twice).
- Using your hands, shape the dough into a round ball.
- Place the dough ball into a bowl lined with a clean towel. Cover and let it rest for a second time until it doubles in size. (this could take anywhere between 60-90 minutes).
- Preheat your oven to 230°C (450°F) and place an oven-safe pot with a lid to heat up for 30 minutes. A Dutch oven is perfect for this recipe! (see notes 7&8)
- Remove the preheated Dutch oven and place the dough into it. You can score at the top if you like. Place the lid back on and bake for 30 minutes.
- Very carefully remove the lid ( you will notice the bread is partially baked and pale in colour - don't panic! That's normal!). Drop the temperature to 220°C (430°F) and bake for a further 20 minutes.
- Remove the bread from the oven (it should be golden brown) and allow it to cool completely before serving. (see note 9)
SAVE THIS RECIPE
Peter's Tips
- I recommend strong white bread flour for this recipe. Sub with regular all-purpose or plain flour if you can't source any.
- Sub with whole wheat flour if you don't have any.
- Sub with all-purpose flour if you can't use semolina.
- If you prefer a stand mixer with a dough hook - that's okay too. However, with this type of bread - it's best to use your hands to get a "feel" for the dough. It's based on the "no-knead" style of bread making, so a fancy machine isn't necessary! Plus, it's fun to get your hands dirty!
- Rest the dough. It's essential to allow the dough to rest before baking. It helps the gluten "relax" and makes it easier to shape the dough. If you plan on baking the bread the following day - rest the dough in the fridge - this will allow the flavours to ferment - giving it an almost sourdough-like taste. Ensure the dough has come to room temperature before shaping and baking.
- Flour your surface with enough flour to shape the dough. Avoid using excess flour.
- Use a proper pot to make this bread. A Dutch oven is preferable. However, a ceramic or stainless steel pot works wonders, too. Just make sure it's oven-safe, and that includes the lid. Avoid using aluminium pots!
- If you prefer, you can bake this bread without a pot. Ensure your oven is hot, and shape the dough into your desired shape. Place it on a parchment paper lined baking sheet and bake for 40 minutes until browned on top. Allow to cool before serving.
- Tap the bottom of your bread when it has finished cooking. If you hear a hollow sound, you know it's done.
Nutrition
This website provides approximate nutrition information for convenience and as a courtesy only. Nutrition data is gathered primarily from the USDA Food Composition Database, whenever available, or otherwise other online calculators.
© Souvlaki For the Soul


Jerry Robin says
Can I use this recipe to make dinner rolls? What needs to change?
Peter G says
You could yes - but I haven't tested for this. You would have to weigh out the dough when it's ready and weigh out the size of each roll - proof again and bake for a shorter time (just some suggestions - not tested!)
Lisa says
The salt measurements are not in the recipe
Peter G says
Updated and thanks for pointing that out!
Ari says
Really good bread, I subbed the rye flour with wholemeal spelt and added about 1 tablespoon of oil to work the dough. Brilliant bread, I left the dough on the kitchen bench overnight to develop and proofed it for 90 minutes before I baked it as per instructions.